Supplies:
Cardstock: Core'dinations
Pattern Paper: Imaginisce and Jillibean Soup
Gems: Imaginisce
Stamp: Imaginise
Ink: Memento
Punch: Stampin' Up!
Embossing Folder: Cuttlebug
Twine: Jillibean Soup
Acrylic Snow Flake: Imaginise
Here's the step out on how to create the magnet above:
To get started, use the i-top punches to punch out a small, medium and large toppers from white cardstock.
Next emboss the punched white circles by placing the 3 pieces into an embossing folder to add a bit of texture to the toppers. I used swiss dots for my sample.
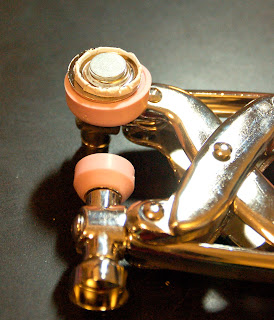
Following the instructions on how to use the i-top, place the metal topper piece on the metal post, slide the punched topper between the pink rubber cup and the top of the metal topper piece.
After the punched paper topper is centered give the i-top tool a squeeze.
Turn the rubber cup piece to the side and press the tabs into the center of the metal topper piece.
Now prepare the base piece of the magnet. The magnet and the metal base come separate as shown.
Place the magnet on the raised center side as shown.
Put the assembled magnet base in the metal cup of the i-top and swing it towards the pink rubber side.
Squeeze the tool to place the metal base into the covered top. Using your fingers, gently press around the sides of the pink rubber end of the tool to help finish crimping the top to the bottom.
Swing the pink rubber end of the tool out and peel back the pink rubber lip to release the finished magnet.
To assemble the card, after creating your card front lay the 3 magnet pieces on the front.
Slide the magnets on the inside of the card (back of the card front) to hold the magnets in place on the front. The magnets are very strong and held well through 2 pieces of heavy weight cardstock easily.
The i-rock is so easy it's crazy. Simply place the Imaginisce i-rock gems where you want them on your card. Turn on the i-rock to allow it to warm up for a few seconds and then place the top of the i-rock to the top of the gem until you feel the glue melt on the bottom of the gem. You will feel the gem slide a bit when the glue liquifies.
Have a good one!
-kimber


3 comments:
adorable snowman card...LOVE it! :)
This is a SERIOUSLY cute card, Kimber! And thank you SO MUCH for the tutorial, as I am definitely a "see and do" sort of crafter. This snowman though is just the cutest thing I've seen in a long while - GREAT JOB!
Absolutely gorgeous card,you have done nice job.
Plastic Card.
Post a Comment